Yes, that’ right.
We can’t leave well enough alone.
After looking at our beloved 10+ year old 1/72 Shuttle Stack, and the work we have done recently on the 1/72 scale Monogram “Discovery” and the 1/100 scale Tamiya “Columbia-Spacelab” models, I guess it was a matter of time until we began, not just contemplation, but actual construction of another, new, better version of the Revell-Monogram 1/72 scale Space Shuttle Stack.
This version is going to incorporate a lot of the specialized component parts and decal systems used in our more recent Orbiter builds, along with some very new, first-time-out parts that have caught our attention since then.
As I noted on the 1/100 Tamiya Orbiter article, the shuttle tile decals done by Ed Bisconti are still the best I’ve seen, especially with respect to the black tiles on the underside and nose areas. Some of the Bisconti “white tile” decals will also be used, specifically around the forward cockpit windows, where tile were used throughout the program on all Orbiters.
There have been a number of methods of trying to achieve the look of the Thermal Blankets used on the low-temperature areas of the Orbiter sides, payload bay doors and wing upper surfaces, that have been showcased in a number of modeling articles – some even using surgical gauze in order to achieve the textured surface of the blankets, but this looks somewhat “exaggerated” and very time consuming.
We’re going to try and find a way to capture details from the photography we’ve collected of the Orbiters over the past few years and create a “photo-realistic” approach to the problem, but we’ll talk more on this later.
Right now, the plan was to acquire the basic raw elements we would need to do the build.
We acquired an un-built, but “opened” Monogram Shuttle Stack kit from eBay.
We ordered the Shuttle Main Engines and OMS Engines, as well as the 1/72 scale Shuttle Decals from Real Space Models in Florida. We had used the Real Space SSME kit on the 1/72 Discovery model and they are widely accepted as accurately detailed parts.
A new element were the AMP Space Shuttle Windshield Kit, which was found during a Google search for 1/72 scale Shuttle model parts. Accurate Model Parts in Australia has created a system of plastic “frames” and clear plastic window units that come together to create the appearance of the thick windshield system used on the Flight Deck of the Orbiter, in a more faithful representation than I have seen before. At a cost of about $10, they are well worth looking into.
There is also a growing trend in 3D printing, which is now making its presence felt in the space modeling detail parts realm, as “NiParts” has pitched it’s tent under the Shapeways 3D manufacturing banner on the Web, and is offering a number of very finely detailed replacement parts specifically intended for the 1/72 scale Monogram Shuttle model.
We chose a number of these for this build:
A pair of SRB Top Sections...
the SRB Sep Motors to go with the upper sections...
a pair of SRB Aft Skirts (a Monogram skirt is shown for comparison),,,
a pair of SRB Heat Shields (a Monogram shield is shown for comparison),,,
a set of three Shuttle Main Engines...
and finally a pair of OMS Engines in their pre-launch protective covers (no one has ever offered this before). The photo shows one of them after painting.
For most of the NiParts products, they represent “first time available offering to the space-modeler marketplace, especially the covered OMS Engines.
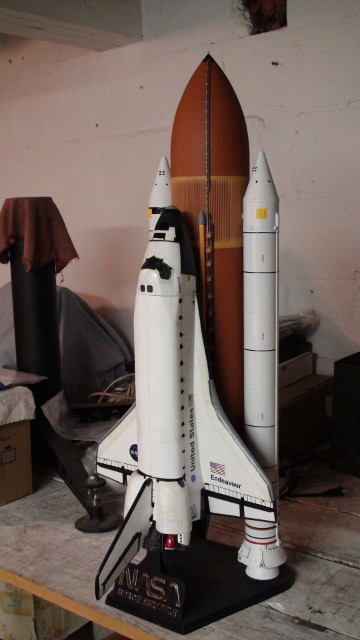
Here stands Endeavour, and the STS-134 stack, as a complete model project. I used the original Monogram model stand supplied for temporary support.

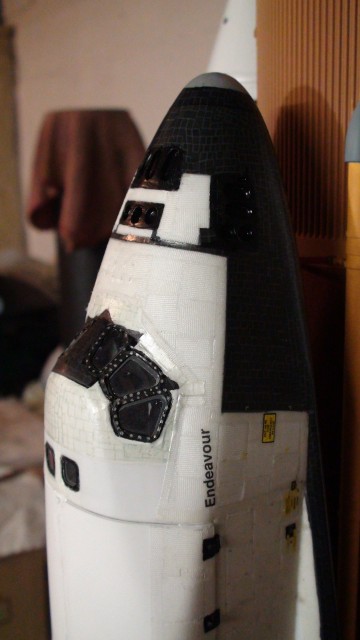
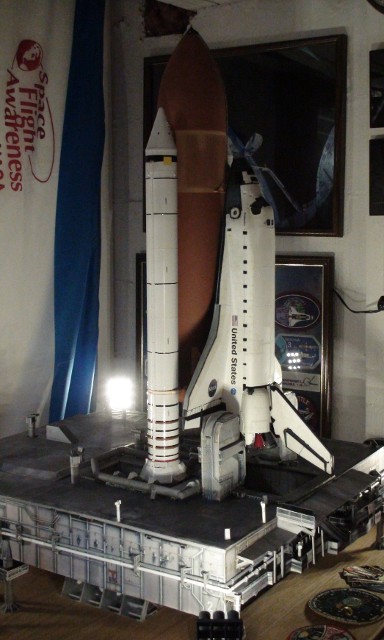
Endeavour, and the STS-134 stack, now stands on the MLP.
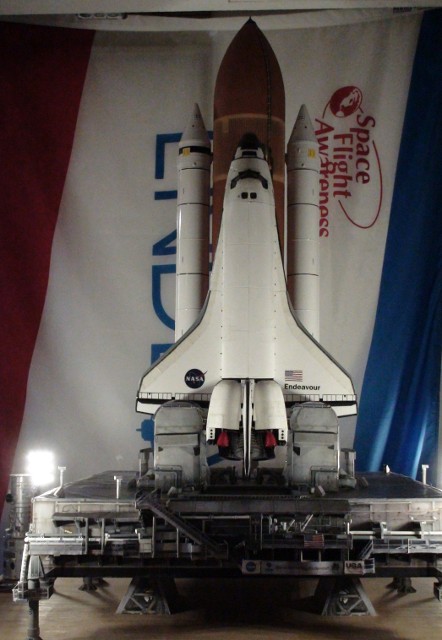
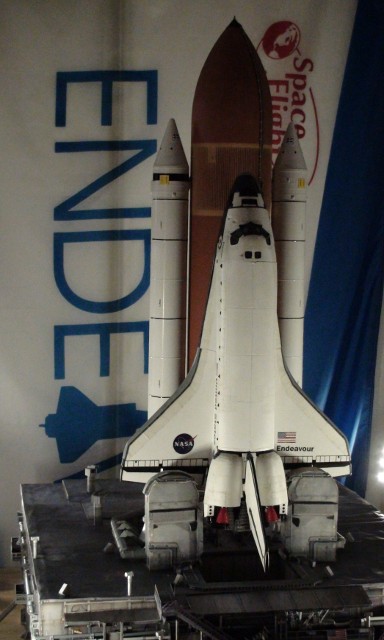
We have recently re-modeled the MLP that Endeavour sits on with LED lighting for the work platforms on Side 1 (south), as well as "sipped" a new, LED-illuminated Edu-Craft 1/72 scale Shuttle Era Crawler-Transporter under the MLP.
Take a look on the 1/72 Crawler-Transporter... Click Here.
To see the entire building of the 1/72 STS-134 Stack, including the use of the Real Space resin and Shapeways/NiParts 3D printed parts, go to the Shutterfly Album Page.
https://link.shutterfly.com/NjFfgW58IPb