I have said this before, and it's no where more true than right now...
I cannot leave "well enough" alone.
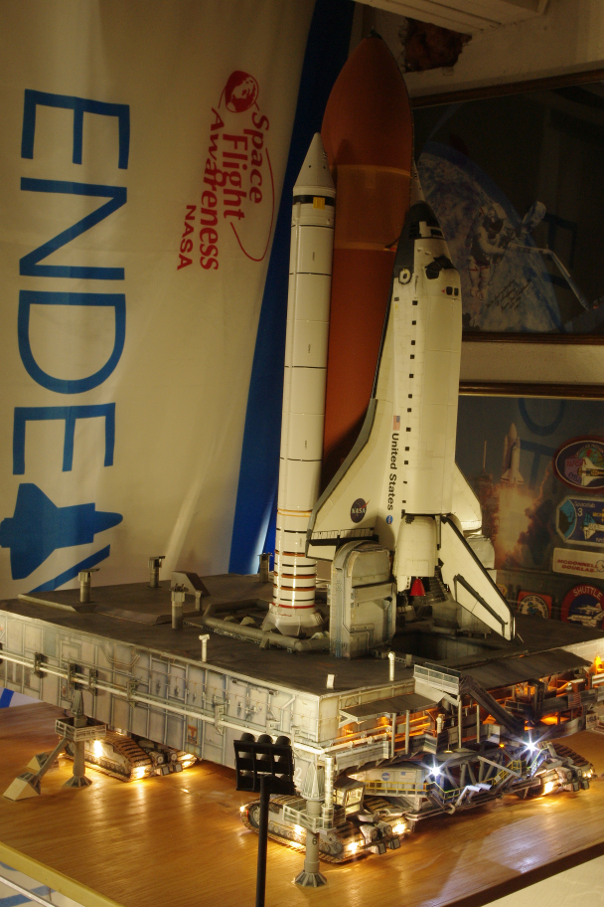
The fantastic results of the 1/72 Shuttle Stack build, which became Endeavour and STS-134, resting majestically on the 1/72 scale Edu-Craft Mobile Launch Platform looked great, but still looked "wrong."
How can this system be sitting there without the Fixed Service Structure and the Rotating Service Structure nearby? If the SRB Flame Deflectors are under the pad, it should be on the hard-stand of LC39, and if it were on the hard-stand, the RSS & FSS would be there.
The problem is I do not have the room for the Edu-Craft 1/72 scale Shuttle Launch Complex, and quite frankly, after doing the original scratch-built version back in the early '80s, I've done that and did not want to (really) do that again. So, the only other places the Shuttle can be while it's on the MLP are in the VAB waiting to go to the pad, or in Roll-Out, on its way to the pad.
The VAB has pedestals to support the MLP during stacking and check-out, so let's do that...
I need a Crawler.
So, I ordered one from David Maier and got to work.
We've done two other Edu-Craft Crawlers on this site already, so this is not going to be another "build review." Just something to show "what happened" along the path to completion.
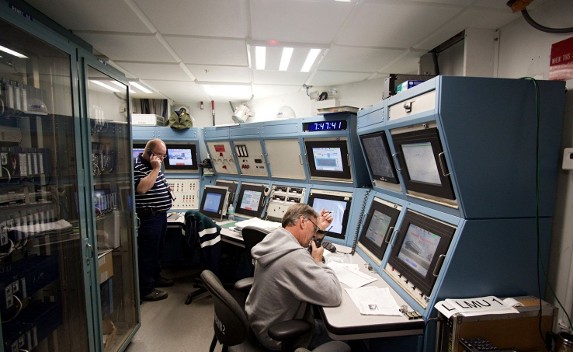
This is a photo of the Crawler's Engineering Control Room. There are two windows on Side 2 (east) of the Crawler, which is that control room. When you look in those windows, this is what you will see. As the equipment racks sit in the middle of the space, I rotated the image horizontally and took out the worker standing in the background, for the left side view.
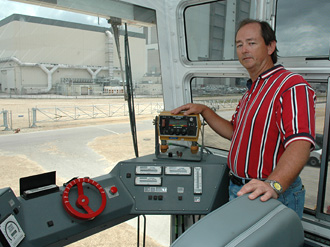
This is the reference photo I used to do the two cabs on the Crawler. The chairs and drivers were obtained from Shapeways as 3D-printed parts. They were originally intended for a Naval setting (aircraft carrier), but were re-purposed to the needs of the Crawler.
The normal Edu-Craft Crawler uses "tread-ed" track belts only on the outward-facing corners of the trucks. However, we wanted to do tread-ed track belts on all locations, so we got additional "outboard" truck sheets from David at Edu-Craft in order to fabricate them.
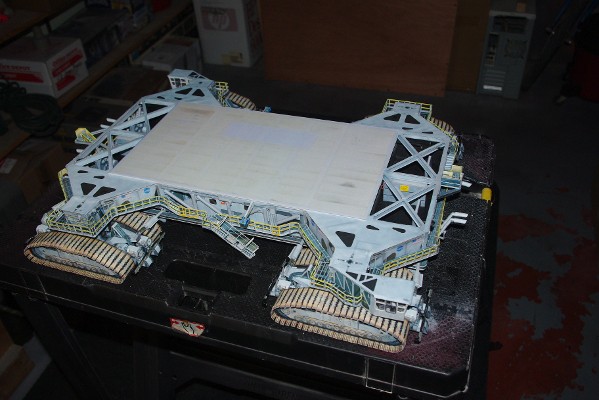
Here's a shot taken late in the primary build, All of the LEDs have been installed and the Cable Tray which runs around the bottom perimeter of the body is installed, but no walkways have been done yet. We were doing a final lighting test before final closeout of all wiring compartments.
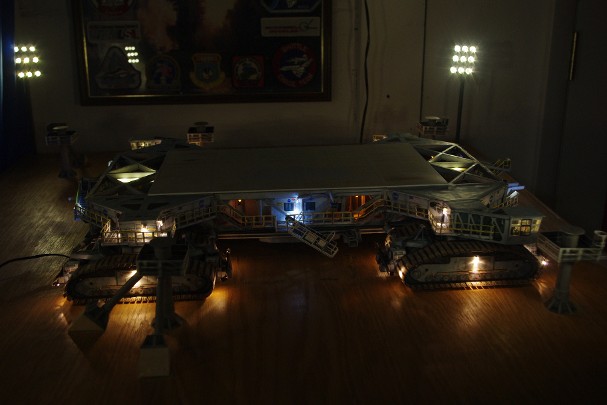
Another view with the he workshop lights off...
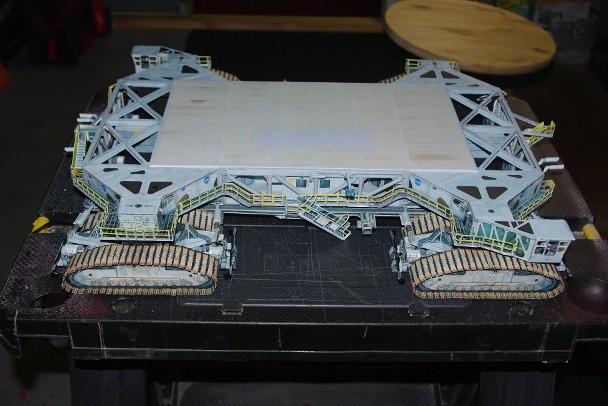
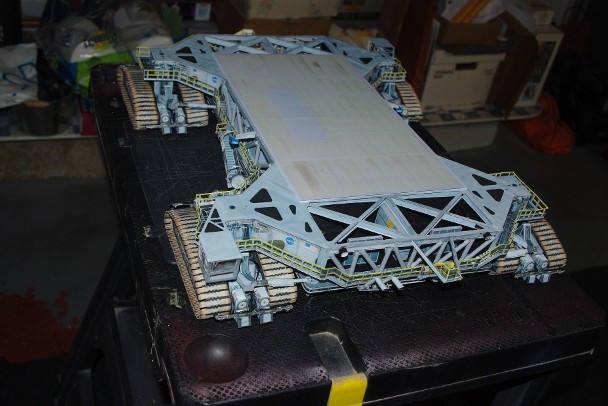
Here, we are nearing full completion. All walkways are installed. The walkways normally are folded, solid paper systems. I knew this would obstruct a lot of the lighting effect on the Crawler, so I wanted to do "open" railings on the walkways. So, after partial folding and gluing, I carefully cut-out the inner sections between the railings and vertical supports printed onto the outside surface. Some strategic areas, near corners and joints between sections, were left solid, in order to reinforce the location. I think the results were well worth the extra effort required.
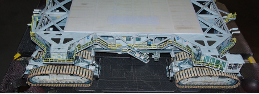
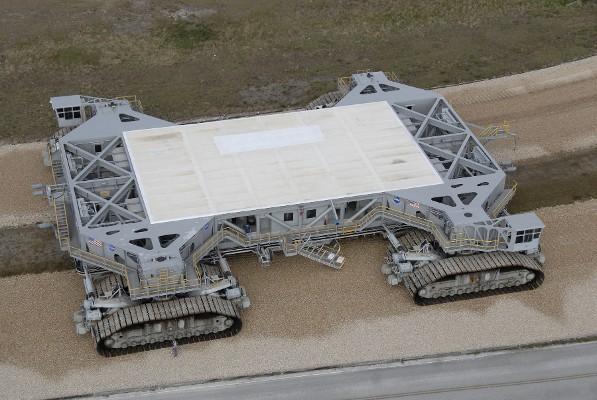
During the fabrication of the top cover plate, I tried using spray-on adhesive to stick the cardboard inner panel to the paper skin, only to have the adhesive "grab" the paper and ruin the piece. To replace it, I used the NASA Crawler photo shown below, pulled the image of its cover, corrected the perspective and re-sized it to match the correct dimensions of the part. The image was printed onto the same 60 pound test cover stock paper that David uses in the kit, on professional Canon printers at my workplace. You can see how good it looks.
After completing the Crawler, it was time to re-model the 1/72 MLP. besides installing the LEDs on the Side 1 (south) work levels, I corrected the "offset" in the MLP, which is accounted for in the original model only as a black area on the south end. That offset is part of the real Shuttle MLP and intended to Promote SSME exhaust to flow to the south, while the SRB exhaust flows to the north. The sides of the MLP are normal height, right to the south end. Only the bottom surface is higher to the South, to just past mid-point in the Main Engine Flame Tunnel. This places all work platform support angles at the southern bottom edge of the MLP.
We also needed to remove the SRB Flame Deflectors from the surface of the display stand, so that the Crawler could go in.
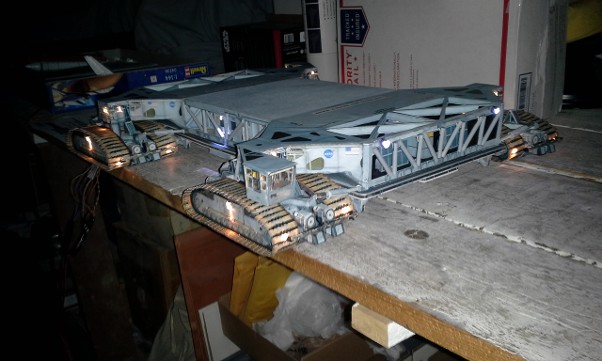
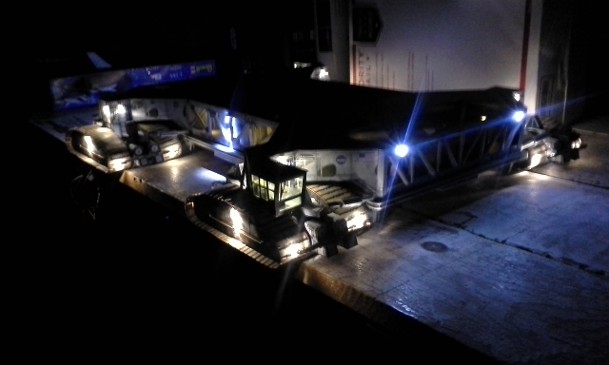
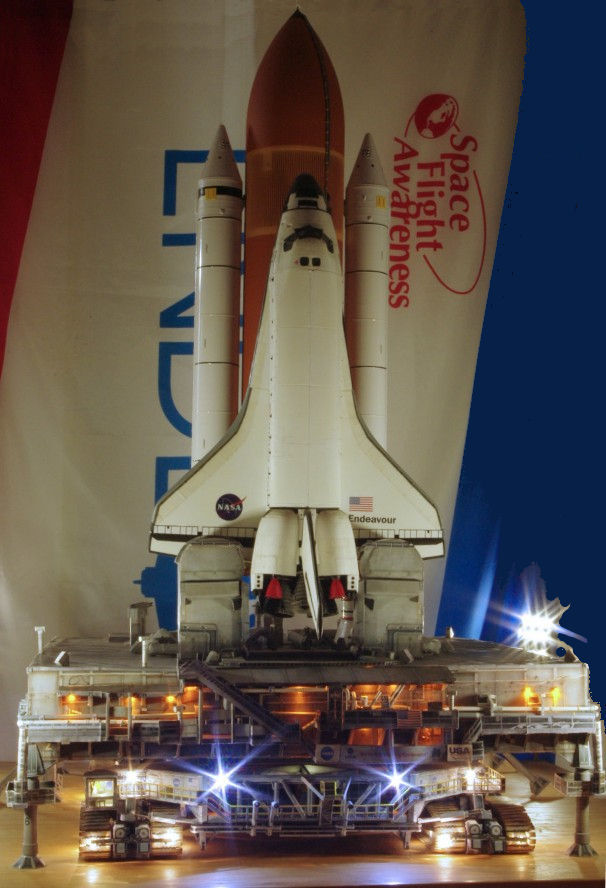
Here's the new Crawler, sitting atop the display platform, all lit up.
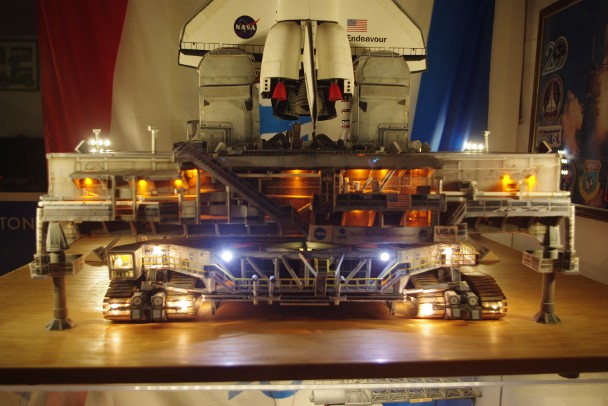
Here's the view from the South end, If this were in the VAB, the Crawler would just now be beginning the "jacking" operation, to raise the MLP off of the Support Pedestals for roll-out. Super-Bright White LEDs were used for the Crawler headlights, warm white LEDs were used for the Tread belt Spray Arms and all other perimeter Crawler lights, except for the yellow LEDs used in the inner bays near the control room doors. All MLP work platform lighting are yellow LEDs.
Again, my sincere "Thank You" to Mr. David Maier, for without his kind support, the Crawler would not have come out so beautifully.