During the work to build the STS-134 "Endeavour Stack," we started work on the other Monogram 1/72 scale Orbiter-only model we had purchased through eBay. It would be Payload Bay Doors open, and end up representing the display of Atlantis at the Kennedy Space Center. We pick up the project, right about where the first Cockpit work was done...
Meanwhile, the "Atlantis" model progress continues...
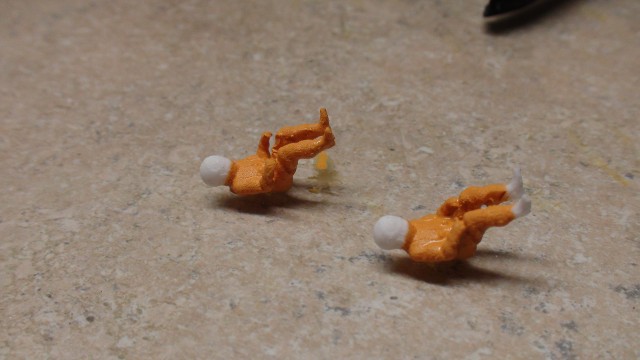
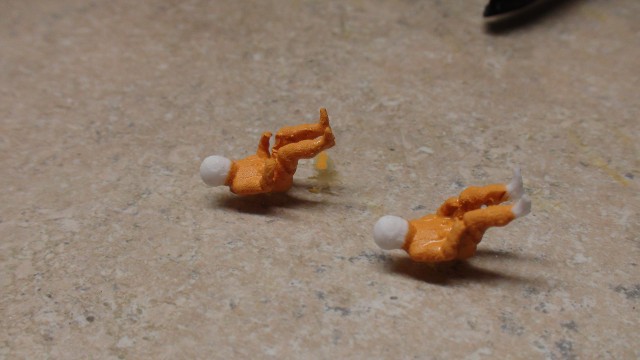
The cockpit of Atlantis will feature two "prime" crew figures, which are revised versions of the "Generic Astronaut Figures" in 1/72 scale offered by Max Grueter in his Shapeways.com store. They are 3D printed set of 9 figures, which spacesuits that look a bit like those of a 1950's Sci-Fi movie. But there's not that much detail to change, and nothing that a little paint can't cure. with Pumpkin Orange for the suits, flat black for the boots, gloves and fittings, and Clear Blue for the face shields, BINGO - instant Shuttle Crew.
We are ordering another set to get two more "Mission Specialist" crewmen to fully populate the Flight Deck. This also means fabricating a pair of Shuttle "chairs" to go on the Flight Deck in the Mission Specialist seating locations for ascent. More on this later...
Atlantis's cargo bay will at least have the Docking Adapter, used to dock with ISS, which can seen here, hand-fabricated out of spare 1/72 external Airlock parts, Plastruct rails, tubes and plastic sheet materials. There's still a lot more exterior detail to do, but the main structure for the airlock is complete in this view.
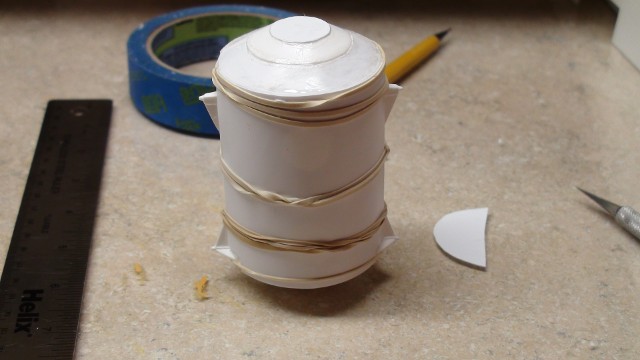
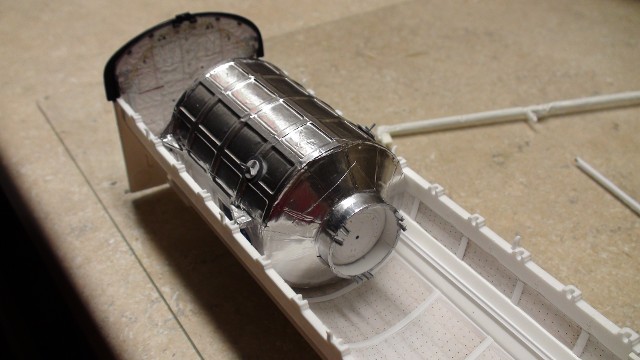
We've decided to build a Multi-Purpose Logistics Module (know as Raffaello) out of a set of spare Spacelab parts, to go with the airlock.
The "left-over" Spacelab module was "stripped down of all of its surface details, which meant grinding, scrapping and sanding away all of the current hatches, windows and bolsters.
We then created a conical-section "filler plate" for the area where the crew module extension would go from 0.030" styrene, as well as a new end cover to close-up the opening in the module.
We also took sections of 0.010" styrene sheet to re-cover the external surface of the module, upon which new banding detail will be applied. Now, we're pulling NASA photos of the MPLM from STS-135 to do the work.
On top of the new "skin," we placed sections of 0.10" wide, 0.020" thick styrene strips, in order to replicate the exterior panel sections on the MPLM.
Then the entire exterior was covered in Bare Metal Foil aluminum material.
We fabricated a "berthing collar" to replicate the attachment port for ISS, out of a section of the "communications satellite" payload from the original Monogram payload set. The "ring" section was glued together, sanded smooth and placed onto the end of the module. The six docking "guides" were also added and painted Aluminum.
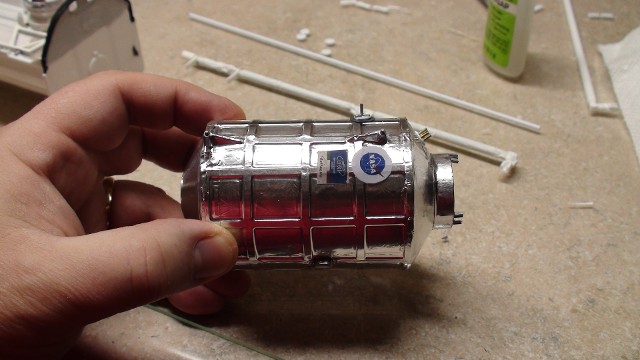
We also found a photo of the NASA and ASI markings on the side of Raffaello, pulled 'em, printed 'em and placed 'em onto the side of the module. You can also see one of the two RMS Grapple Fixtures made for application the the module.
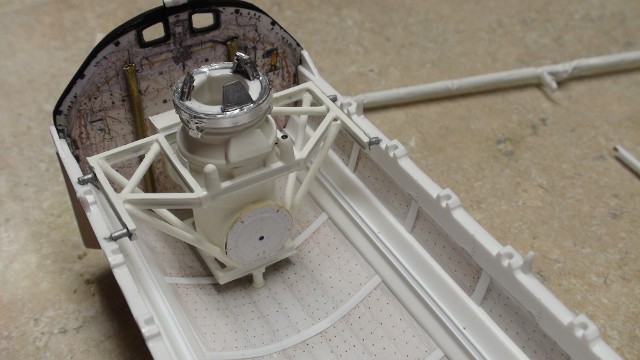
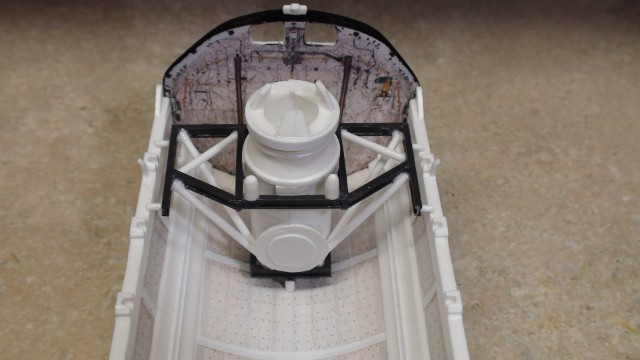
We also completed work on the Forward Airlock and Docking Adapter. After completely coating the unit wit Flat White paint, the mounting trunnions were painted Aluminum and Bare Metal Foil film was applied the upper docking ring. A photo showing the exterior hatch cover was also photo-lifted, scaled and printed for application onto the outer hatch area.
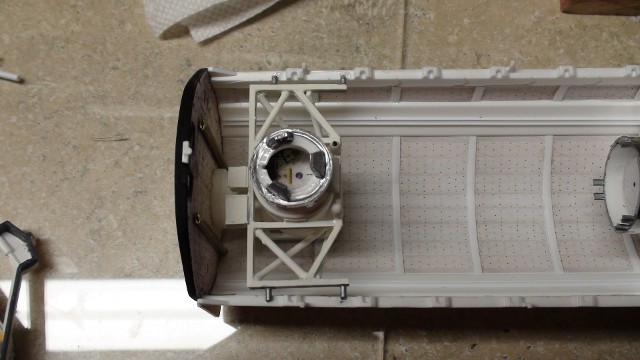
Another photo of the docking system was found that showed interior detail below the docking ring. We lifted that out, re-scaled it and made an application that sat on the interior upper surface of the airlock - right where it was supposed to be. The two little hand-made styrene electrical boxes on the docking module frame can be seen here also.
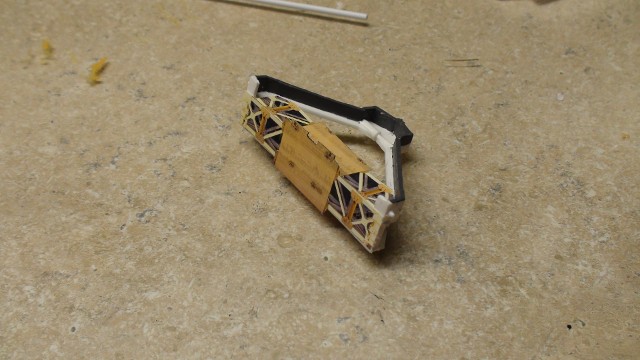
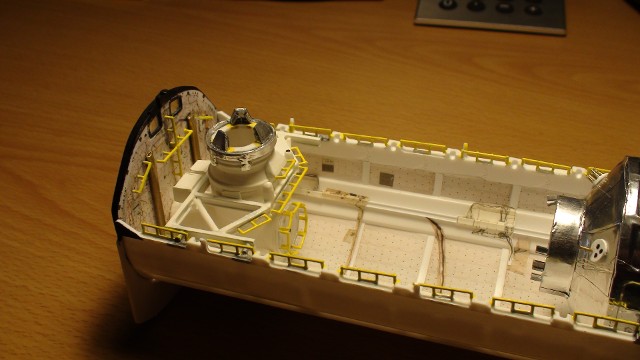
There was a small "logistics carrier" or equipment-stowage truss located behind the MPLM in Atlantis' Payload Bay. After creating a basic frame out of styrene I-beams, I decided to try photo-lifted detail elements and place them onto the frame. While I need to add the rest of the detail to the lower "face" of the Equipment Carrier portion, the overall result is quite good.

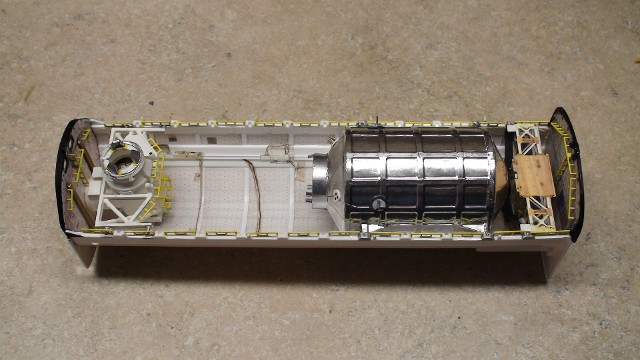
Here's the full compliment of hardware, resting in the Payload Bay. We may try to do some "wiring" between the Orbiter chases and the modules, as seen in the photos, but that's another story...
The STS-135 mission flew with the Canadian RMS on the port side of the bay and the OBSS on the starboard side. We applied Bare Metal Foil material to the RMS, in order to simulated "thermal blanket" covering, then painted the exterior in Flat White.
The Monogram-provided "end effector" on the arm is totally incorrect and was removed. A short section of 3/16" styrene tube was placed onto the arm's end to create a more accurate end effector. The outer markings will be applied later, prior to installation.
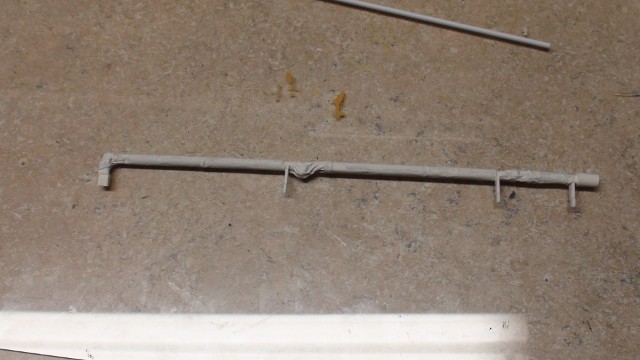
 The OBSS will be fabricated out of 3/16" tube, with fixtures at both ends and along the surface, as shown in the NASA photos. The supports from the Endeavour's unused RMS were carefully cut away and will be used to support the OBSS along the starboard edge of the bay. RMS grapple targets were fabricated and placed onto the top edge of the OBSS, in accordance to photos.

A NASA photo of the RMS end effector had excellent detail of the roll pattern on the end, so we pulled the detail from the photo, corrected alignment, and printed a strip of detail long enough to wrap around our model's end effector. The wrist TV camera and spotlight were fabricated from plastic stock.
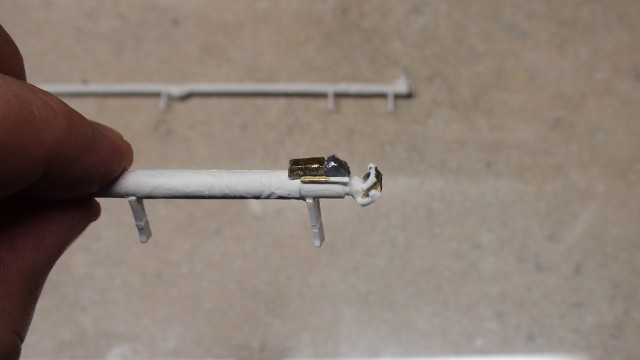
Similarly, we also used NASA pictures of the "business end" of the OBSS to add a camera body and laser scanner onto the end.
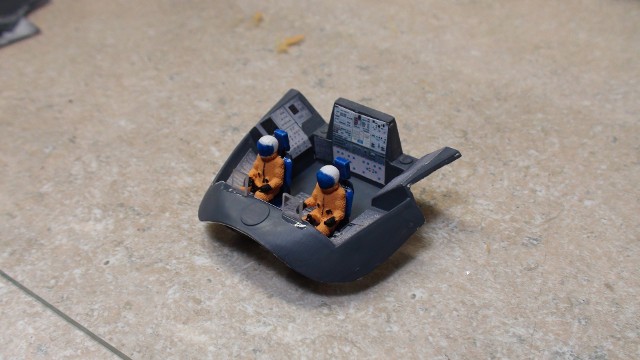
Our two "additional" astronauts arrived from Shapeways, and we proceeded to get them suited up for ingress onto the Flight Deck of Atlantis. Two "removable seats" were fabricated from plastic stock. Once the two crew were initially painted with black boots, gloves and suit connections, they were mounted into their seats, and the assemblies were placed into position on the Flight Deck.
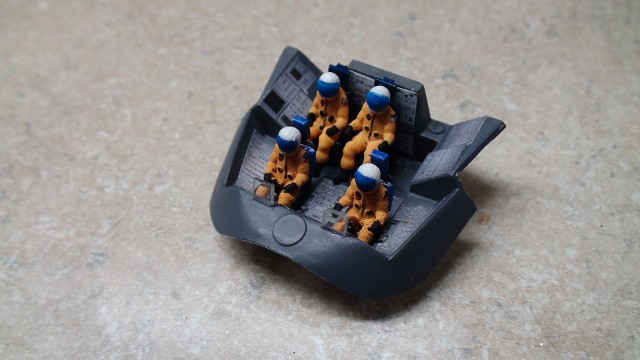
MS1 is typically seated between and behind the Commander & Pilot, while MS2 is seated on the starboard side of the Flight Deck.

This arrangement allows MS1 to assist the flight crew during ascent or entry with the monitoring of Orbiter systems.
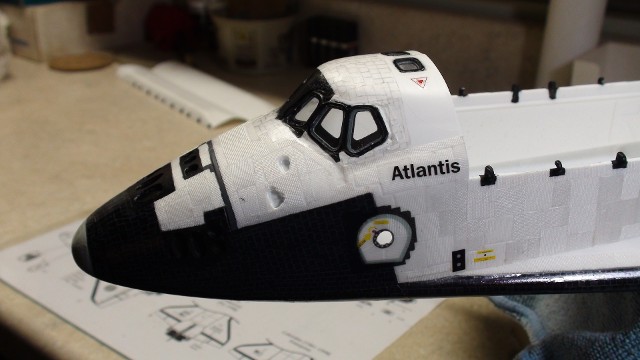
Meanwhile, we also proceeded with cladding the underside with re-scaled Bisconti Black Tile decals, and supplementing them with Real Space Shuttle marking decals for the more "standard" Orbiter markings. The white tile around the cockpit were, once again, cut down version of the Bisconti White Tile decal set, shaped to fit the correct application.
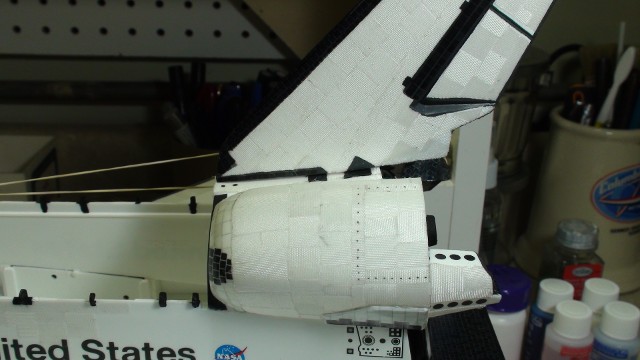
Atlantis' aft section was also finished, with proper decals and paint markings, as those developed for Endeavour. The two OMS Pods and Vertical Stabilizer were also attached after the decal work was completed.

As before, a strip of Scotch Blue Painter's Tape was run just below the hinges and the black tile details around the whinges were added. Forward window frame fastener details need to be added, the same way we did on Endeavour - by using the tip of 0.5 mm pencil to place dots of Aluminum Silver around the edges of the windows.
We've created hand rail details for the airlock/docking adapter and they looked so good, we decided to finish the job by adding EVA hand rails along both Payload Bay longerons, as well as to their proper locations on the Forward and Aft Bulkheads.

We also "lifted" some of the electrical wiring detail from the NASA STS-135 Rotating Service Structure photos, when the payload bay was open and was being prepped for flight. we then transplanted that onto our Payload Bay interior. It turned out pretty good...
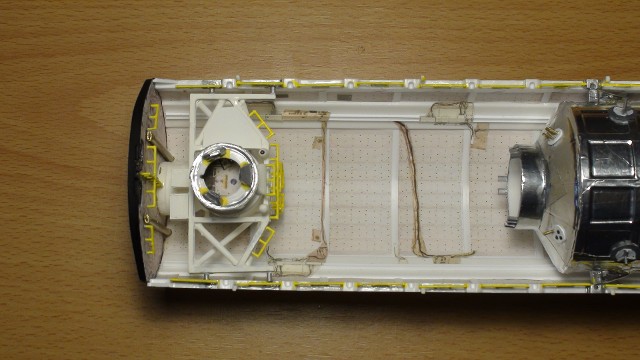
With EVA hand rails along both sides, as well as the forward and aft bulkheads, I think the Payload Bay is finished and ready for final integration.
The interiors surfaces of the Payload Bay Doors were sprayed in Tamiya German Grey, in order to provide the proper color relief when the radiators are installed onto these surfaces.

This dark German Gray color looks a lot like open carbon fiber material, which is what the door skins are fabricated from. After the application of the Gray color, the exterior surfaces were Testor's Dullcoat-ed, in order to set the finish.

After installing all of the external markings, we did a "once over" for touch-ups to all tile surfaces. Once all touch-ups were dry, we placed Micro Mask onto the forward and overhead windows. Once the Micro Mask was set, the entire model has sprayed with Testor's Dullcoat, in order to set the finish.

While the "bird" was curing, I went after placing the Radiator Panels I had fabricated out of 0.020" thick Styrene "Car Siding" sheet and Bare Metal Foil Chrome Aluminum foil covering. The texture of the V-grooved Car Siding gives the panels a hint of surface relief below the film and the 0.020" thick stock provides depth. I re-curved the panels before installation, used Scotch double-sided tape to set the "central edge" - the edge nearest the center-line seam of the doors and weld cement to bind the two together.

The assemblies were clamped until the cement set. The results are good.

After the Dullcoat had completely dried, I removed the Micro Mask from all the front windows. I cannot tell you how great Micro Mask is for jobs like these. Can't believe I hadn't used it sooner.

I'm very pleased with the way the silver "dot" tile fasteners came out around the front windows, as well as the AMP Shuttle Window Set itself. Maybe it's just "practice," but this is the best I've done thus far. The nose just looks great!

At long last, it was time to install the Real Space Shuttle Main Engine set, which includes the most accurately scaled OMS Engines so far. Although I still feel the NiParts 3D printed SSMEs are a bit better, the "good ol" Real Space versions look pretty impressive as well. Atlantis was stood on her nose (using a microfiber cloth buffer, thank you) on the workbench, with her Body Flap pinioned between two push-pins. This allowed me the have a near-as-can-be flat surface upon which each engine could be aligned and set with ACC. The four RCS rear nozzles were also installed here.

Now, it's time for the Flight Deck to be installed into the forward fuselage. The two upper edges of the aft flight deck are captured above the two molded ridges on either side. The forward edges of the flight deck rest against the interior surfaces. We used weld cement on all joints.

The two "heads-up displays" can be seen through the front windows.

From this angle, we can see the flight crew seated within.

Then, the assembled Payload Bay slid down in between the forward and aft edges of the opening in the fuselage. It's a very snug fit, but if you've removed the inward-molded portion of the mid-deck wall, where the tunnel would normally connect, it will pass by.

Once the Payload Bay was officially in place, the RMS and OBSS were located on their respective sides of the bay - the RMS on the port side, the OBSS on the starboard side.

Then it was time to fit the Payload Bay Doors onto their hinges.
The view aft in Atlantis' payload bay.
The view forward towards the Airlock and the Payload Bay Windows.


Atlantis is completed!! Now, we need a display stand equal to the magnificence of this model. I decided I wanted to display "my Atlantis" the same way the real Atlantis is being displayed at the KSC Visitors Complex - with bay doors open and "flying" at a 42 degree angle. So. we're creating a dual-pillar display stand to support Atlantis at the tilted angle.

This was it!! Two slender wood pillars. terminating in black ABS mounting plates, which set-screws attaching the Orbiter onto the plates.These are the same attach points that would normally be used to attach to the External Tank of the full "stack" model.

Atlantis is sitting at the same 42 degree angle that she is at her exhibit home at Kennedy Space Center in Florida. The big difference is, we still have the payload of STS-135 on board. The MPLM "Raffaello" and the Lightweight Express Logistics Pallet are still in place, along with the still-stowed Remote Manipulator System arm and the Orbiter Boom Surveillance System.
There was only one real problem with these last two Shuttle model builds, the Endeavour stack and Atlantis on-orbit.
Now as I look at the Discovery build I did earlier, which is documented elsewhere on this Website as "the last Shuttle model I'll probably build," I wondered "why can't we bring Discovery's thermal protection system up to the same level as these two birds?"
So, "the last Shuttle model" might be getting renovated...

There you have it. A raft of "un-truths."
Not only was the Discovery build of 2011 NOT the last Shuttle model I would ever build, it turned out to be a springboard from which these two builds have come. These last two Orbiters look so much more realistic, that I think another "visit" to Discovery is in order.
Discovery's TPS retro-fit has begun.
The Dream is Still Alive...
For the fantastic detail parts used to make these models a reality, I need to thank:
NiParts - on Shapeways.com
Max Grueter Designs - on Shapeways.com
Real Space Models
Accurate Model Parts. Ltd.
and Mr. Ed Bisconti, for initially developing those wonderful Shuttle Tile Decals.
We are now providing the 1/72 scale Shuttle Payload Bay Floor Detail Set and restored versions of "Ed Bisconti's" 1/72 scale Shuttle Tile Decals to other Space Modelers who want to use them in their Orbiter builds.
Check in the Space Model Product Listings page on this website for more information.

