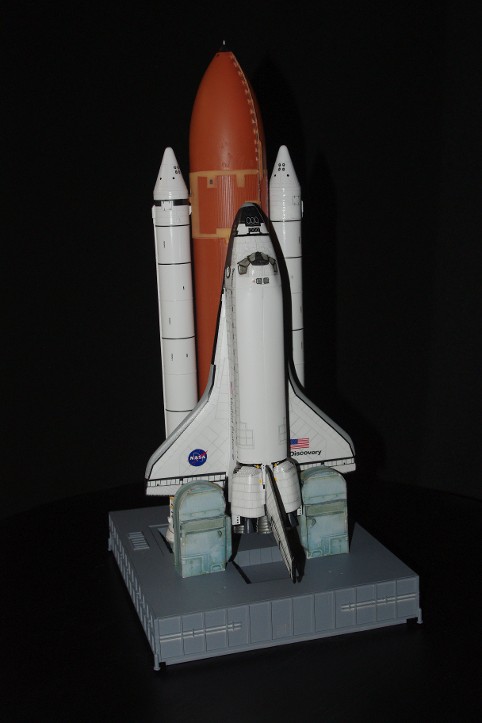
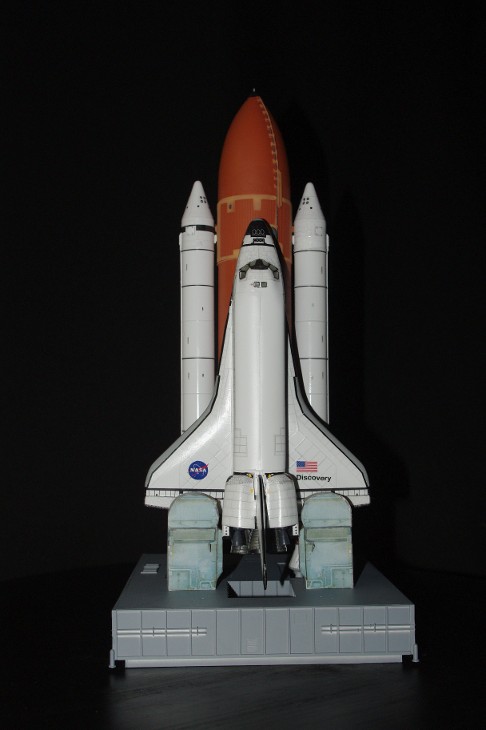
It occurred to me, just after deciding to complete the Minicraft 1/144 Shuttle as STS-4, that I now had one 1/144 scale replica for each of the Shuttle Missions I had the privilege to witness – STS-1 in 1981, STS-4 in 1982 and… Whoops. No STS-133…
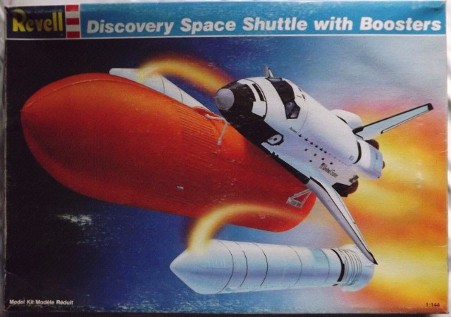
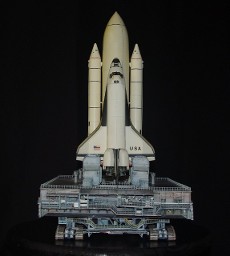
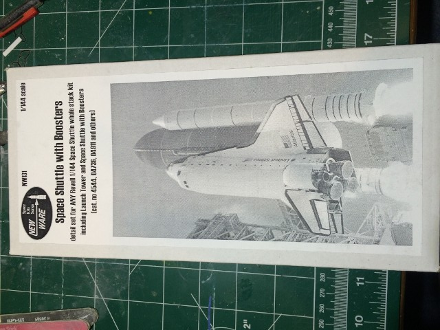
So, it was back on eBay to find a reasonably priced Revell 1/144 Shuttle stack. I thought about doing another Airfix copy, but decided on the Revell kit instead, after further deciding to try the latest New Ware product for Shuttle model improvement – New Ware #NW131 1/144 Space Shuttle with Boosters Parts for the Revell Kit. This would bring the 1/144 scale version up to the same fidelity level as our last 1/72 scale Monogram build, which employed NiParts 3D-printed components.
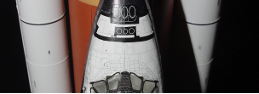
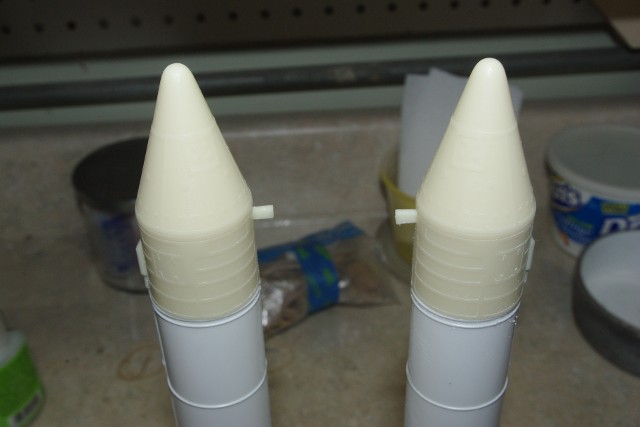
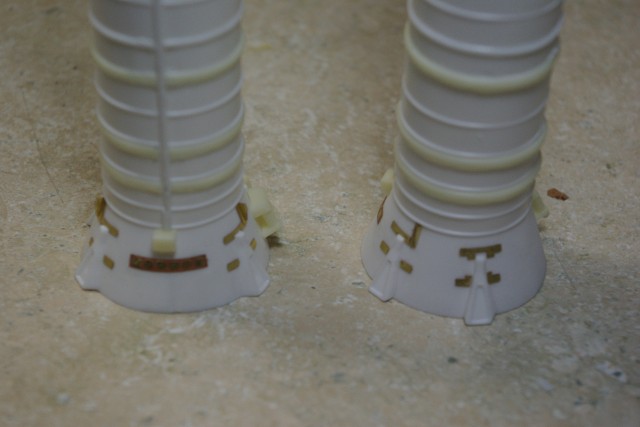
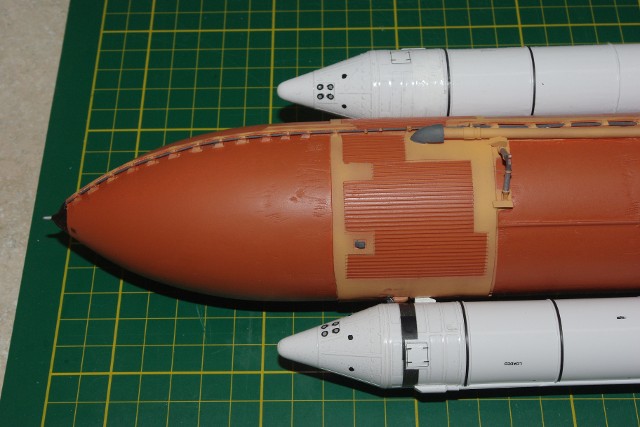
Right from the “get-go,” the New Ware set placed big changes onto the Revell product. The tops of the SRBs need to be cut off with a razor saw, just at the first double-ring booster joint down from the nose, so that the New Ware replacement resin Forward Frustums and Nose Cone parts and be substituted. The New Ware forward sections have far more, and far more correct surface detail than the Revell parts did.
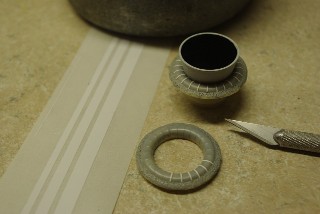
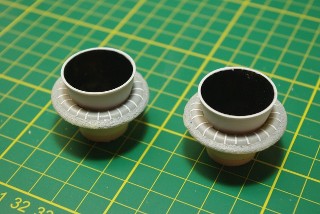
Then, the inside diameter of the Aft Skirts must be opened up slightly, in order to accommodate the New Ware resin Nozzle Seal Rings. The Seal Rings and SRB Nozzle Extensions were built up separately from the boosters, with the ring seals being painted Dark Ghost Gray, with sections of 1 mm white stripping tape used to do the seal support straps. The SRB Nozzle Extensions were painted Aircraft Gray outside and Flat Black inside.
There are a significant number of PE parts used on the SRB Aft Skirts. There are also replacement resin wiring chase boxes, which require trimming away the molded-on boxes from the Revell boosters. Not really a big issue. New Ware also provides proper resin Aft Separation Motors, intended to be placed in the “correct” locations on the skirts – not where Revell Germany wants you to put them. There are also thin resin applications which replicate the joint heaters used on all post Challenger SRMs.
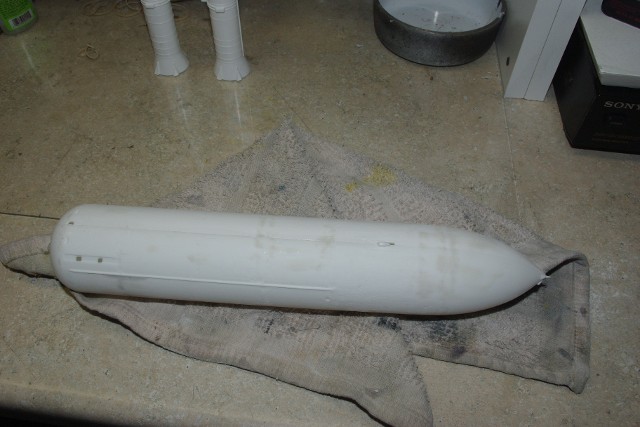
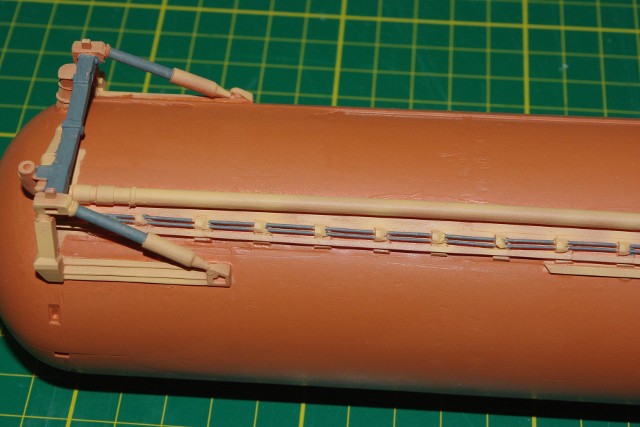
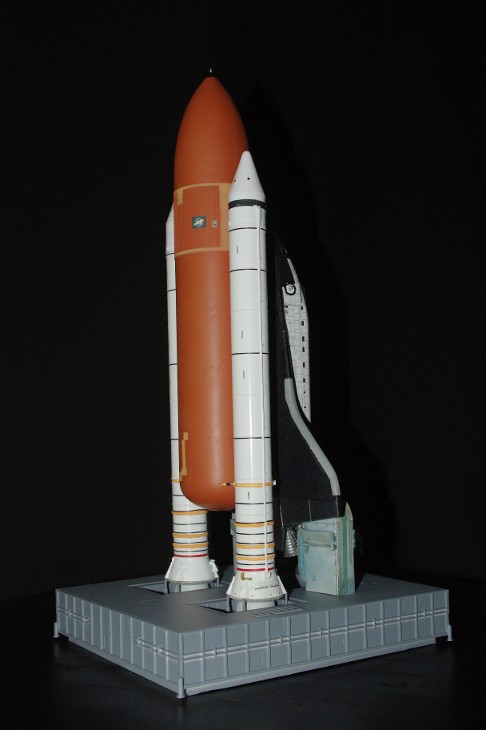
On the External Tank, all surface relief needs to be removed so as not to interfere with the installation of the New Ware parts.
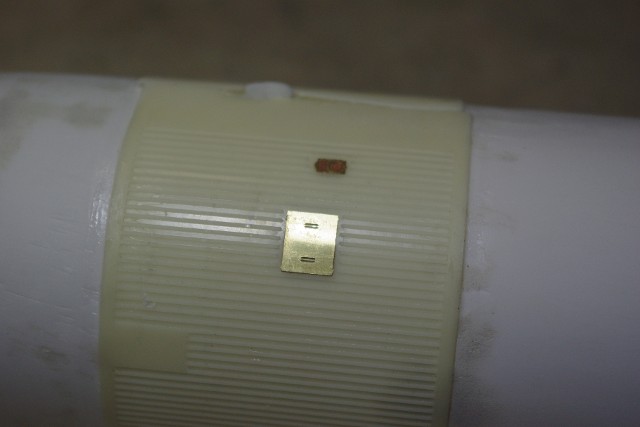
First application onto the “cleaned” ET are the Inter-tank detail sheets, which come as two very thin resin parts, each wrapping half-way around the ET, forming front & back sides.There are two tiny resin antennas that go into recesses on the Inter-tank skin, as well as the rear inter-tank access hatch and the Gaseous Umbilical Panel, where the LH2 vent arm on the launch pad connects to the tank.
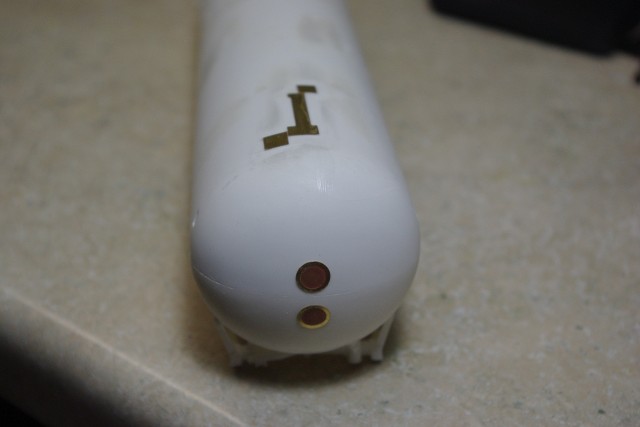
The lower surface ET details include the three PE metal sections for the hoist and skid attachment locations, and the two LH2 tank access hatches which go onto the bottom dome of the tank.
There are additional detail parts for the ET’s Aft Orbiter Support, such as resin replacement Struts and resin housings which are placed over the Revell support “uprights,” to bring them into the proper form factor.
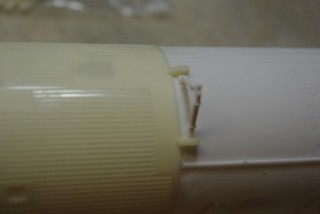
There are also two resin “frost ramps” which go alongside the Orbiter nose “bipod.”
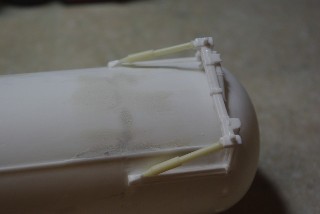
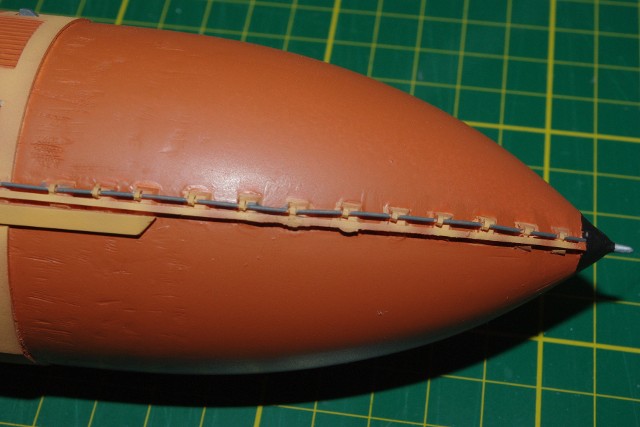
The most intense of all the detail set are the resin Frost Ramps, which support the pressurization and purge lines that run along the side of the ET, and extend all the way up to the LO2 “Vent Cap” at the nose of the ET. You can transcribe the mount locations from the diagram in the manual onto the tank, but I chose to scan the document, make a full-size copy. I then placed a strip of Scotch double-stick tape over the layout position for the resin parts on the diagram - the tape will hold them in place. Then I ran the thin styrene rods up through the holes in the Frost Ramps to the finished position and locked them into place with tiny drops of ACC.
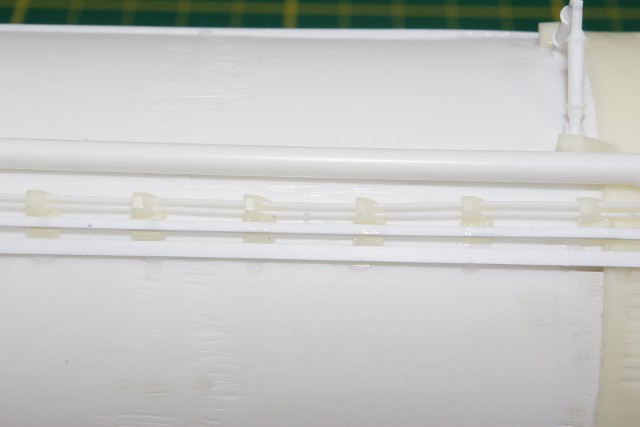
I chose to do the lower and upper portions of the Frost Ramp/plastic rod system separately, then joined them up once on the surface of the ET. With careful trimming and alignment, we got great results.
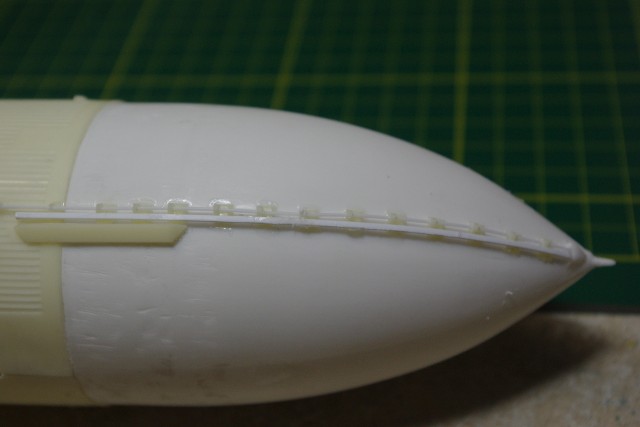
Once the last long resin Wiring Chase parts were placed onto the tank, at the edges of the Frost Ramps, the whole thing was set aside to cure.
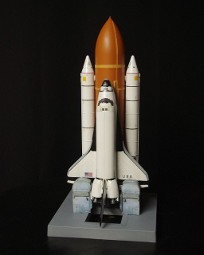
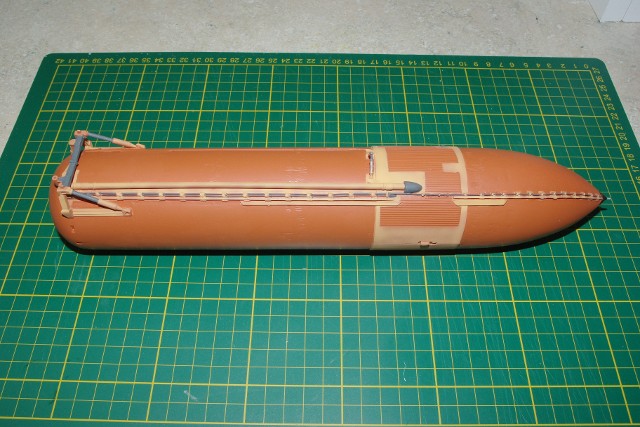
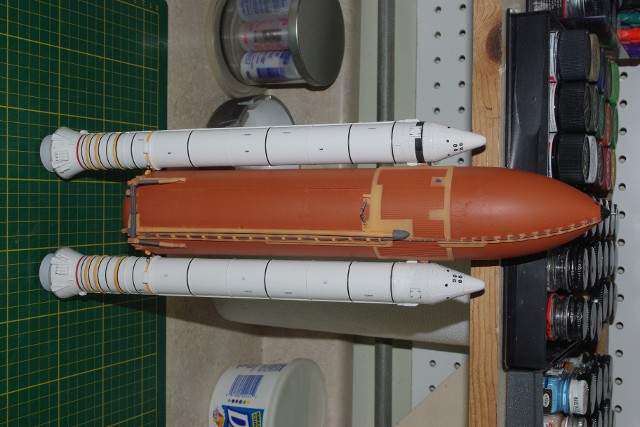
After cement curing, we sprayed the entire tank with a base coat of Rust-Oleum “2X Satin Cinnamon,” which is the closest commercially available color to the real ET color I’ve ever found.
After that cured completely, we masked off the sections of the tank which needed to stay Cinnamon color, and began to airbrush on the “soft pumpkin” color I custom mixed for Launch & Entry Suits of the 1/72 scale Shuttle Crew. The same color found its way onto the 1/72 scale ET, as the best replication of the lighter SOFI color I had seen to date.
Lastly, the Pressure & Purge lines were detail painted in dark metallic gray, the Support Strut sections, Aft Support cross-member and LH2 feed line covers were done in Euro Gray and the LO2 Vent Cover (nose cap) in Metallic Black.
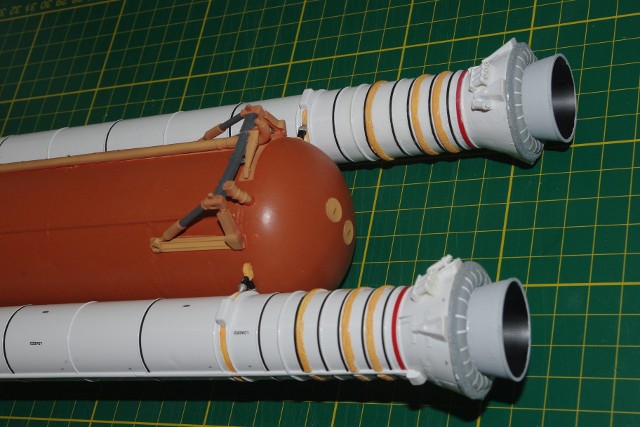
The main SRBs were painted Gloss White overall. Once the paint dried, 1 mm black and 2 mm red stripping tape was placed onto the proper field joint locations on the booster, in accordance with the Revell decal diagram. The New Ware SRB marking decals were then placed onto the boosters, in accord with the New Ware instructions. Once the Seal Ring/Nozzle assemblies were placed into the Aft Skirts, the SRBs had their decals covered with gloss acrylic and they were ready for integration onto the finished ET.
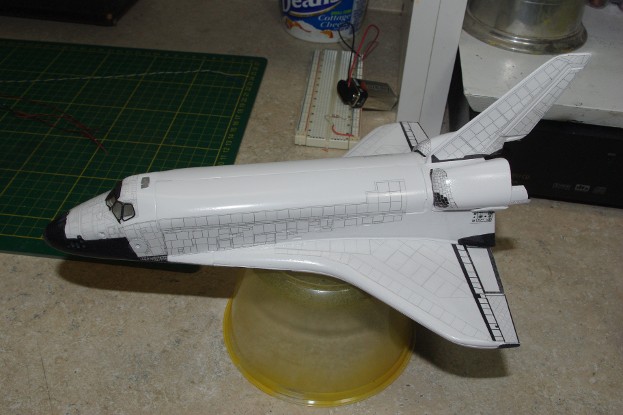
The Orbiter was built up to a primary working level, with both main fuselage halves and both wing sets. The two OMS Pods were installed, and then the first of the New Ware Orbiter detail parts were employed, as the RCS “tails” were attached each pod.
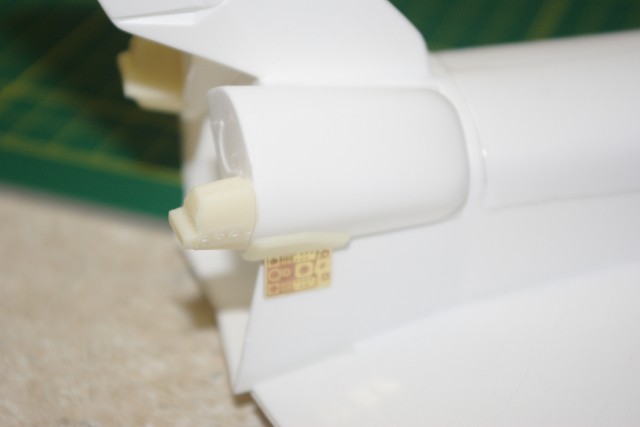
At this point, we also installed the Aft Umbilical Plates on each side of the Orbiter’s boat-tail, as well as the protective plates that sit above the umbilical locations on the lower surface of each OMS Pod.
The Payload Bay was installed only for structural integrity, as the doors would be fastened shut for launch-mode display.
The three New Ware resin Shuttle Main Engines and the two OMS Engines were painted while still riding on their mold stems.
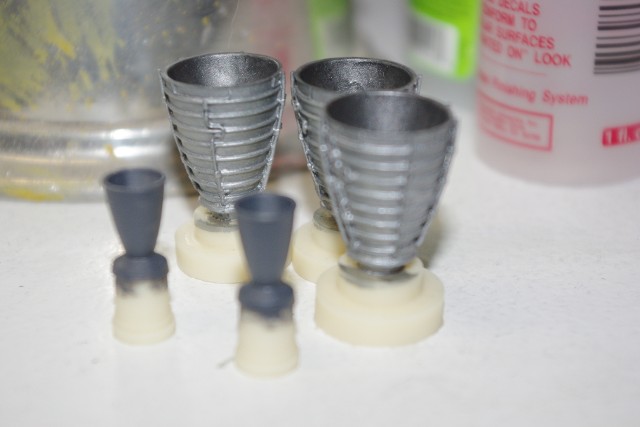
The Aft Engine Bulkhead was also painted German Gray to match the Orbiter underside black tile base color. After application of the appropriate tile decals, the engine Gumbel Covers were printed and applied to each engine blister, and the three SSMEs were installed. After installation onto the Orbiter body, the left over gray areas will be touched up in Flat Black to integrate them into the tile decals.
I had a decision to make...
I could either use the same J&J cloth bandage tape FRSI method I had used on the 1/72 scale Orbiters, or I could attempt to re-open the quest for a "decal-based" alternative. After trying numerous times to lift actual blanket detail from various NASA photos and getting that to work onto the model's surface with no real success, I decided to try another approach.
I was able to find images of the "pattern" of the FRSI blankets, from various images I found on NASA Spaceflight.com, which came from United Space Alliance documents. While incomplete, they served as a point of departure from which an "FRSI map" could be generated and turned into decals.

Here are the initial results.
The front surfaces of the OMS Pods are now part of the 1/72 scale Late Era Shuttle Tile Decal Set, as these turned out looking so good. The area surrounding the front windows are a combination of the original White Tile decals, cut down to proper size for the era, and the new blanket map sections on the upper surfaces of the nose, below the windows. The black front window "frame" is a new decal I have also added to the Late Era offering, as an alternate for those not wishing to do a set of AMP Shuttle Windows.
Once we got to this point, we began the process of applying the Revell-provided decals, for the FRSI to leading edge gaps on the wings, the side hatch tiles, forward RCS areas, the Payload bay Door hing tiles and all NASA/Discovery livery markings. The remainder of the OMS pod surfaces were done in strips of new FRSI "blankets", arranged to offset the seams.
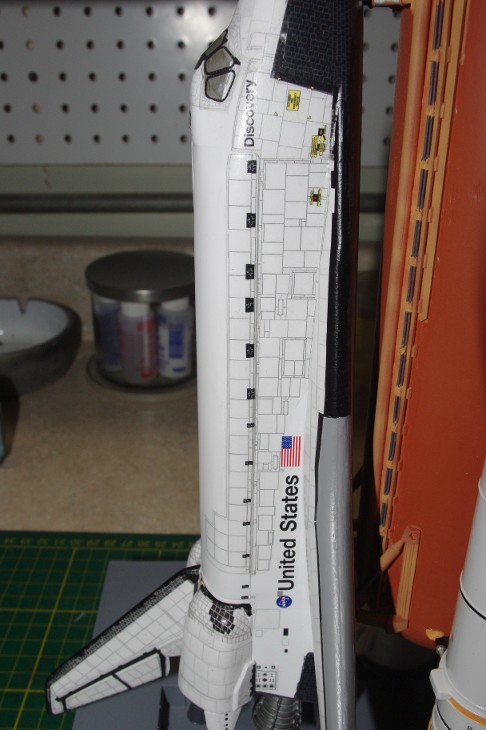
We did the OMS Pods by creating "strips" of the FRSI blankets, and running them in rows, across the body of the pods, starting from the back edge of the pods, to right behind the tiled pod decal face. In retrospect, I should have created a "hatch" covered by for FRSI blankets, to go right in the center of the back edge of the pod, and used the strips of blankets beyond and in front of it. That would have created a more authentic surface, but with Satin coat down, it's a "done deal."

The combination of the FRSI decals, the Original Black tile decals and the Revell-supplied decals, along with the new OMS pod fronts, made for a very impressive result. While the FRSI decals do not have the surface "texture" of the tape method, they do create a good looking result and are quite easy to apply. Based on this "experiment," I may consider offering the clear FRSI decals on the webstore, if there is sufficient demand for them...
My thanks to New Ware for another phenomenal detail product and for NASA Spaceflight.com for all the postings of USA data from the Return to Flight and other orbiter maintenance I was able to dig up. The new Blanket maps would not exist without them.