Once that beautiful Revell 1/144 scale ISS was completed, i set it up on display in the Spaceport's "Shuttle Central" (also know as the basement), along with the 1/10 scale Bandai ISS EVA Astronaut Figure we built some time ago and the new Aoshima Japan 1/72 scale model of the HTV-2 cargo vehicle, as well as a 1/100 scale AXM paper model of the Orbital-ATK Cygnus Spacecraft. Yet, with all this additional content, something was "missing." Wait a minute...There's no Shuttle docked with the ISS!
So, "once more into the breach, dear friends."
We did some eBay shopping, got a reasonably priced 1/144 scale Revell Germany Shuttle Orbiter and decided what additional detail products we were going to use.
We chose two from New Ware - NW006 - New Ware 1/144 Space Shuttle upgrade Etched Detail Set for Revell and the more recently introduced NW134 1/144 Space Shuttle Orbiter Detail set. The latter contains all of the resin parts for the Orbiter, which are normally only part of the NW131 detail set for the model with Booster Rockets. This includes high fidelity Main Engines and OMS engines, the OMS pod RCS tips and the tail umbilical "scuff plates." The PE parts do have some overlap from the two sets, so we picked the ones we wanted to use.
We also employed our own LCSP 1/144 Shuttle Tile Decals, along with the impressive detail decals furnished by Revell Germany.
One remaining decal set is a "new item" which we are test driving ourselves before offering them to our customers.
Originally, we published a guide to show how to clad the exterior of a 1/72 scale Orbiter with Johnson & Johnson Cloth Tape to replicate the texture of the AFRSI insulation blankets. This process looked so good on the "big birds" we published 1/2 size details in the guide for those who wanted to attempt the process in 1/144 scale. I have communicated with a number of modelers who have done this and they are well satisfied with the results.
For me, the process seemed lengthy at best, and the texture of the tape seemed "heavy" on the smaller Orbiter model. So I went back to the Web and started looking, once again, for more AFRSI "map drawing" detail.
I found documents published by USA (United Space Alliance), the former Shuttle processing contractor, which contained drawings of the port side of the Orbiter's forward section (hatch side), as well as the port side mid body. With these as the "fuel for the fire," I also found a drawing of the vertical stabilizer, in a very low-grade of resolution. Using these, I revised the original artwork of the 1/144 scale white tile sections for the Tile Decal Set, re-did the artwork for the vertical stabilizer, added "strip sections" for OMS Pod work and other "touch-ups," combined those with "proven" sections of the original Tile decals still needed for the area around the cockpit windows, as well as a properly tiled front window art, and printed the whole thing on White Decal Paper stock, as a "Proof Sheet."
As the AFRSI line color is more "greyed" than that used in our first attempt (the 1/144 Revell Stack seen elsewhere on this site), the patterns are a bit more subtle than before. I can also see the utility of printed this set on Clear Decal Paper, as overlapping of parts would go more easily. The white film's opacity made overlapping almost impossible.
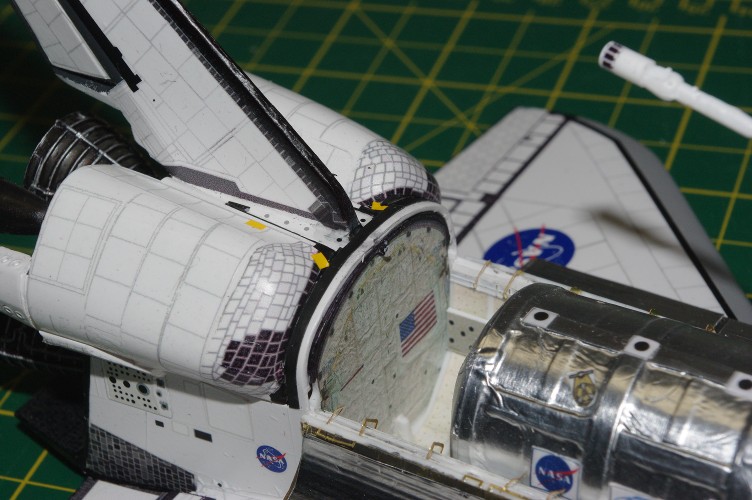
Here are the results...
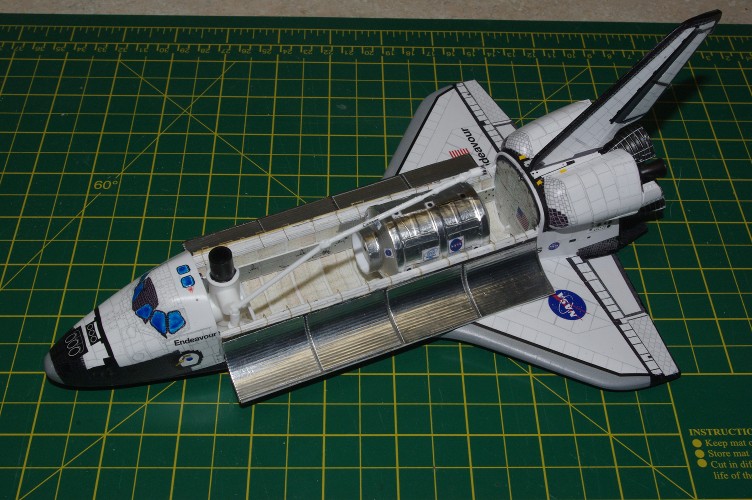
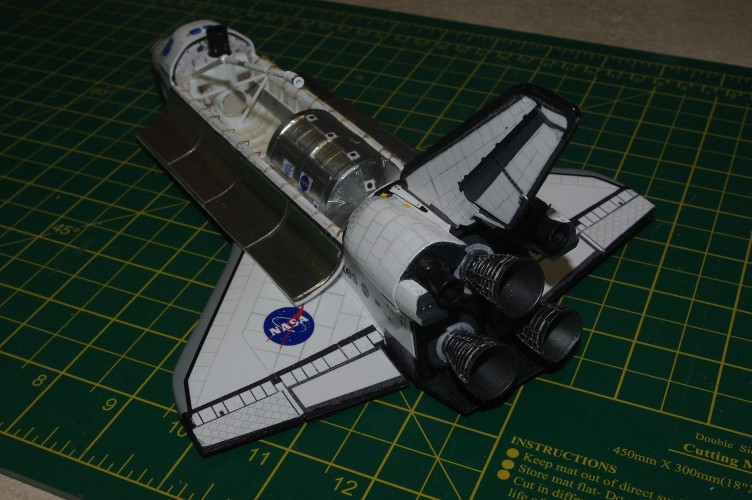
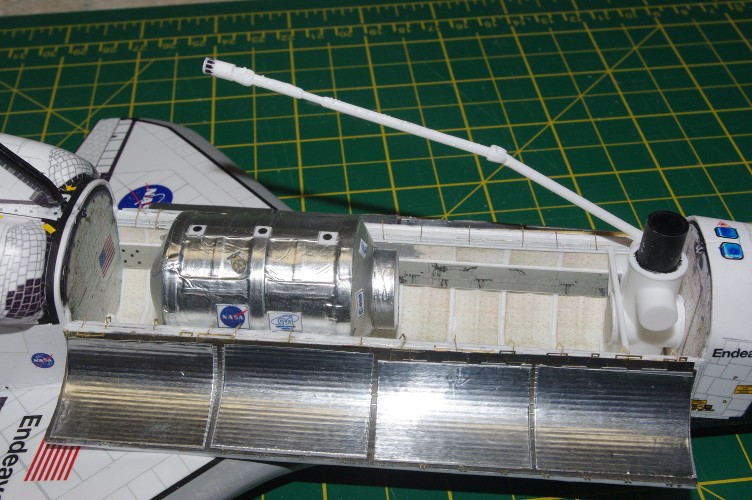
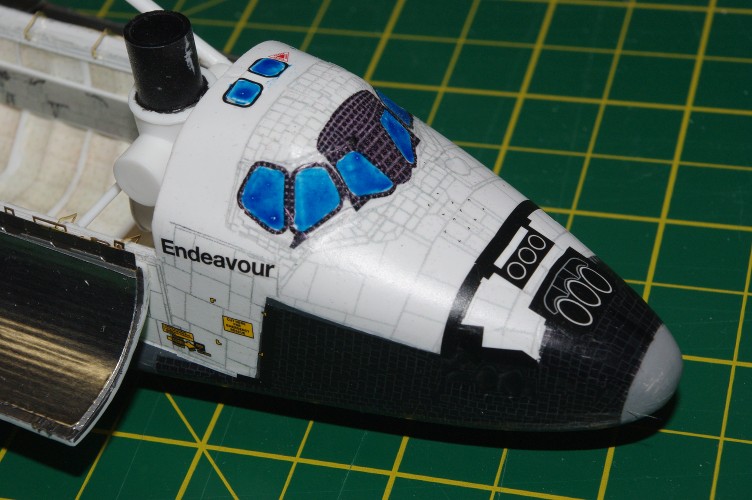
The black collar on top of the Airlock is used to mate with the PMA (pressurized mating adapter) on the end of the Harmony module to allow the Orbiter to "hook" directly to the docking adapter.
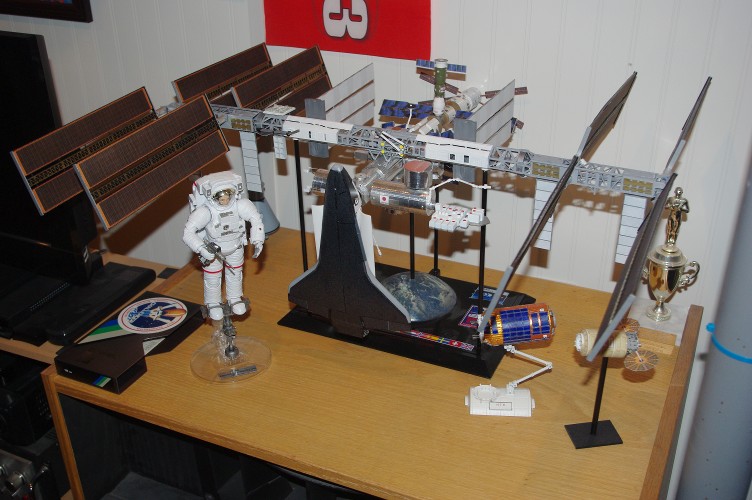
Here, the Orbiter is mated to the PMA, in a very "typical" fashion.
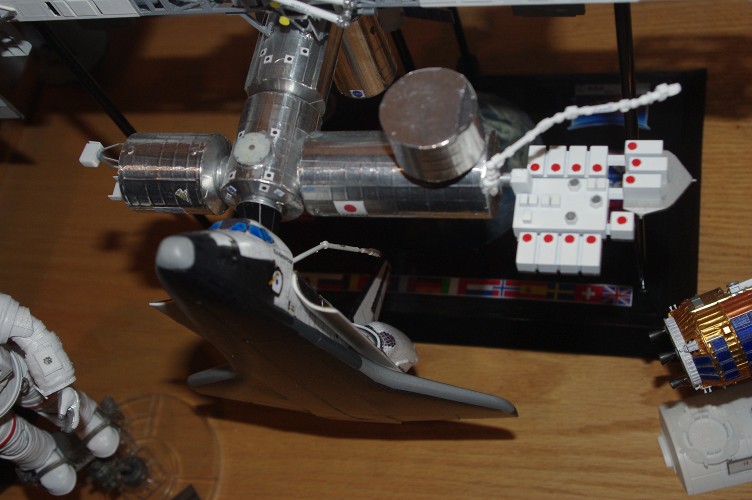

For anyone who may wish to try the new AFRSI Decals for themselves, please go to the "Contact Us/Order Form" page, provide your personal data and request the
"1/144 Scale AFRSI Decal Set"
This sheet sells for $15 and is made on Clear Decal Stock. Please make sure to apply them over the base color you feel is appropriate.
The sheet comes with a set of instructions. Just remember three REAL important items:
1 - Each major decal section should be handled as a separate section. This includes the two wing sections - one for the inner wing "box" and one for the AFRSI strip which runs behind the RCC wing leading edges.
2 - The OMS Pod Access Door decals need to positioned on the rear edge of the pod, with its lower edge lined up with the intersection of the pod and the RCS Tip, Then, once the Forward OMS Pod tile decal section is set, the provided AFRSI strips can be cut into segments to fill in the gaps.
3 - The "1/144 Scale AFRSI Sheet" does not contain any of the black tile decals, except for the Front Cockpit Window Peak, which was pulled from NASA photos of Endeavour. The windows of the model shown here were hand-painted with Testor's Clear Blue in the window locations. The front window peak is intended to be placed over the clear windows to provide the proper outline for them and the tile detail in-between them.
Remember, this Sheet is being offered as an alternative to doing the Johnson & Johnson tape-based AFRSI Application Process. You will still need to properly pre-paint the model with the proper base colors, apply the black tiles and then apply the AFRSI Sheet decal sections to complete the entire Thermal Protection System.
You can find it in the LCSP webstore as the
"1/144 scale Late Era Shuttle AFRSI Decal Set."
Scroll down once you get to the webstore.