I had already built one copy of the 1/100 scale Tamiya kit, from the original kit release, when the "payload" provided by Tamiya was the ESA "SpaceLab" Module and its associate equipment pallet. I chose to build that model pretty much "as is" representing the Orbiter Columbia as it appeared during the STS-9 mission - the first flight of the SpaceLab.
That model is described on its own LCSP Non-Fiction Model Page. You can see it by returning to the Non-Fiction Models main page, scrolling down and clicking on the STS-9 mission patch.
As Columbia was still early in her flight career, the TPS arrangement used was a total Early Era configuration. I still feel that build is one of the best Early Era examples I've done.
In 2012, after the retirement of the Space Shuttle Fleet, Tamiya re-released their Orbiter model, this time with "improved" Shuttle Main Engines (replacing the original kit's "developmental engines), as well as providing a complete suite of payloads as carried by Orbiter Atlantis on it last mission - STS-135.
This build would allow me to use the same full range of Late Era products that we now provide other Shuttle Modelers, and produce a "signature" Late Era Orbiter example. As the 1/100 scale models are far more easily transported than the larger 1/72 scale Orbiters, and my travel and display plans for Shuttle Fest 3 in Titusville, Florida in April of 2024 had not yet been set, I wanted the option of having both late-era and early-era models available for use at the event.

The build began with cracking open the box, doing a part and assembly review and beginning to assemble the major Orbiter body sections.
For this build, I decided to first apply the floor and side wall elements from our Payload Bay Surface Detail Application Set to a trimmed piece of 0.015" thick white styrene sheet, which could then be applied over the molded "ribs" in the Payload Bay Floor of the model. Getting this sheet to stay put required a lot of model clamps and precise cement application.

Here, you can see how the styrene sheet sits down over the molded ribs. The ribs are not an error or Tamiya's part, as they are in the actual locations for the support ribs of the MidBody. The floor covering of the Payload Bay are actually fasten to and above them. Much of the Orbiter's electrical and control infrastructure runs below the floor coverings.
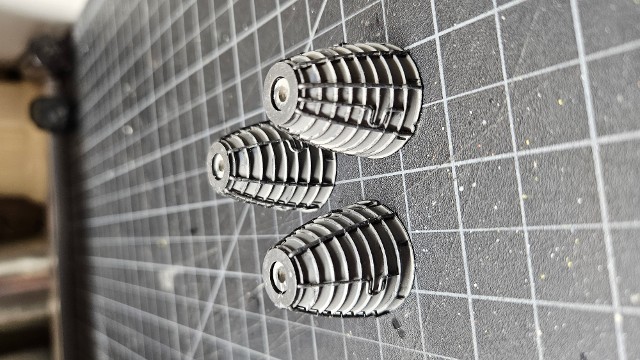
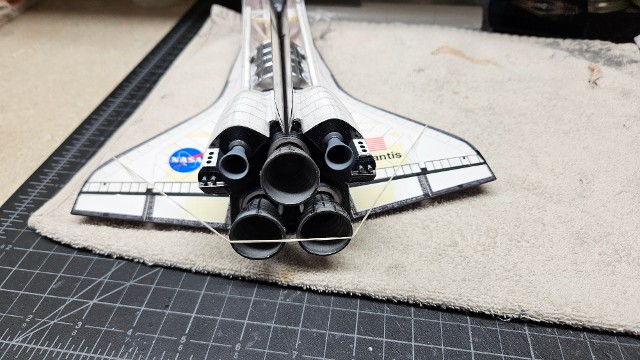
After looking over both sets of engines supplied by Tamiya, I decided to use our own LCSP 3D printed Shuttle Main Engines. The opening at the top of the engine bell is a perfect fit for the inner support body normally used with the kit-provided engines, so the "gimbal" function of the model will still works perfectly.
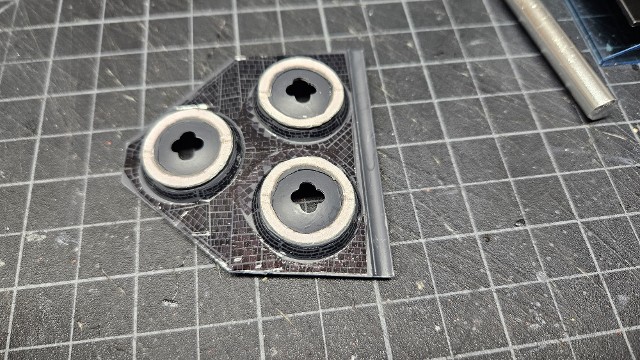
The three SSMEs are seen here, after initial detail painting. After seeing all three of the retired Orbiters, it is clear that the SSMEs (aka, RS-25s) are a soft gray color with darker gray support ribs and purge plumbing.
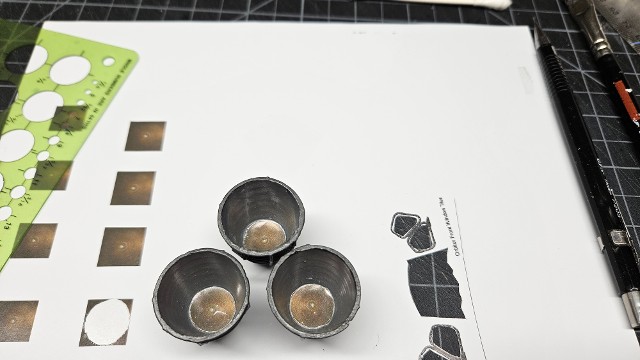
Scaled upper SSME interior detail was and printed onto self-adhesive photo paper, cut out and placed onto the interior surface of the SSME Gimbal attachment screw supports.
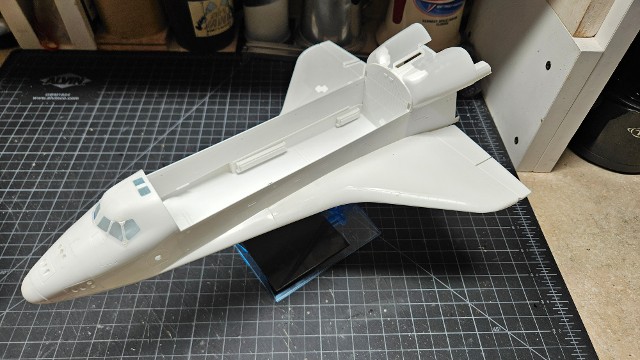
The foundation assembly of the Orbiter's fuselage, wings and OMS Pods were lightly sanded, cleaned and given a base coat of Gloss White paint. I then set about doing the divisions between the forward cockpit windows and the aft overhead windows.
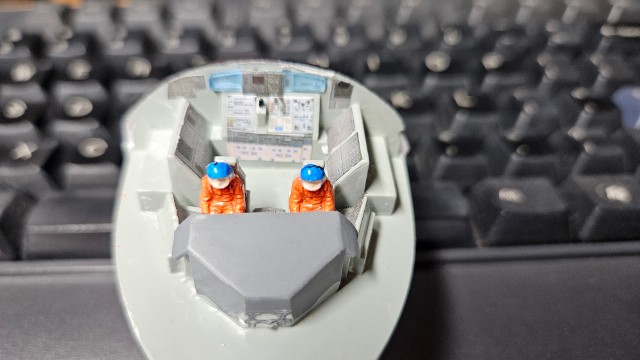
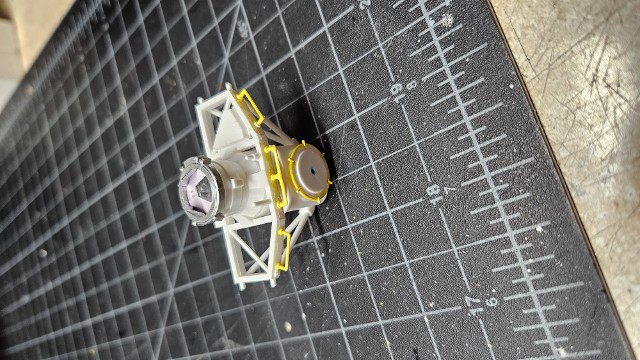
Between other assembly work, I took time to build up and surface-detail the Flight Deck of the Orbiter. It was integrated onto its location on the interior of the forward bulkhead of the Payload Bay for assembly into model.
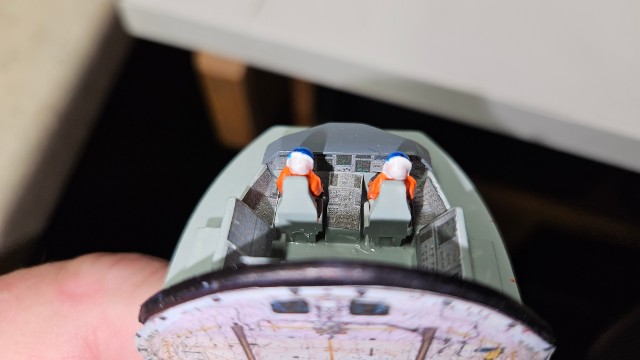
The bulkhead surface that will face into the Payload Bay received the proper application from the Payload Bay Application Set.
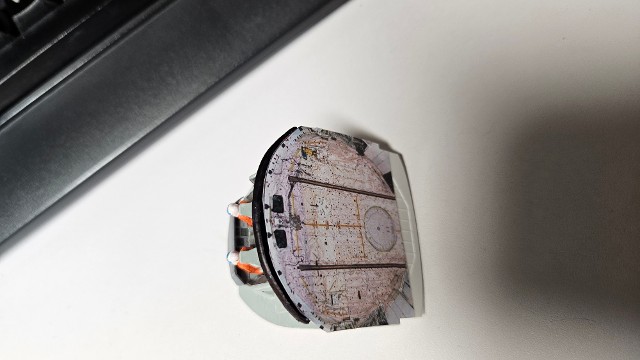
While the SSME Heat Shields of the Tamiya kit's Aft Bulkhead, or "boat tail" are the closest in shape to the actual Orbiter's, they are still a bit off. I had to add narrow rings of thin styrene, that fit the outer edge of each Heat Shield, to properly place the TPS-fabric Gimbal Seal Rings in their correct location. The work on this area of my model literally forced me to completely reevaluate the tile decals I had previously provided in the Standard Black Tile Decal Set and to revise them for better fit agreement on all aft surfaces.
All current production Standard Black Tile Decal Sets now employ these revisions.
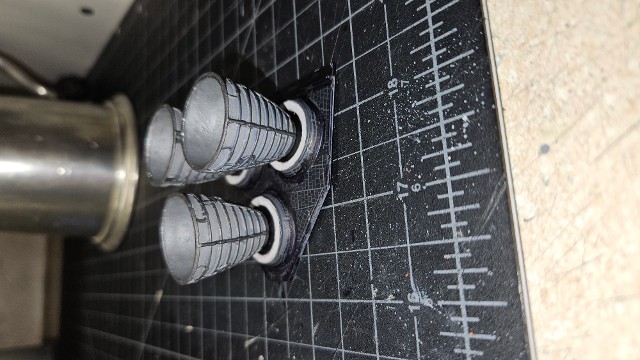
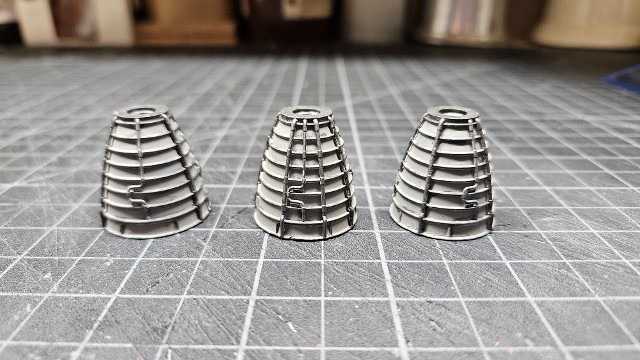
Here are the three 3D printed SSMEs, painted and assembled onto the Aft Bulkhead.
Work continued on the foundation color painting of the Orbiter. I used a Tamiya Neutral Gray background for the "Black Tiles," instead of the normally recommended Tamiya German Gray, in order to create a slightly lighter, more weathered look to the tiles. The white background was left unpainted around the Forward RCS complex, in order to provide greater visual relief of the details in the thrusters of the printed decals. These details become very difficult to see when a darker background color is used.

Tamiya J.A.Gray was used for the RCC Wing Leading Edges and Forward Nose Cap.

Now, the real work of placing the Standard Black Tile and Late Era AFRSI & White Tile Decals began in earnest.
This shot shows how the details around the RCS Thrusters shows when a white background is used, as well as the tile seam detail around the central peak of the Forward Windows. Our decal set shows the interplay between the woven TPS "blankets," used to cover the softer curves of the Orbiter, and the individual white tiles, which were sill necessary in areas where the complex curvature creates higher frictional heating.
After first installing the Flight Deck and Forward Bulkhead into the Orbiter, the Aft Bulkhead and Payload Bay Floor elements were installed.

The chrome-plated Payload Bay Door Radiators look nice as-is, but they lack any sense of the ribbed surface detail which is actually part of the structure. Therefore, I took an image of the Photo-Etched Metal Radiators sold as part of the New Ware 1/144 scale Orbiter Detail Set and crated a set of decals that could be applied to the surfaces of the Tamiya Radiators. They came out looking great.
I also took extra time to do the TPS black tile and blanket application onto the Vertical Stabilizer. All of the Late-Era Blankets in our sets now have the pseudo-ID Markings placed on them. While they are too small to be legible, they still add another level of perceived realizim to the blanket decals.
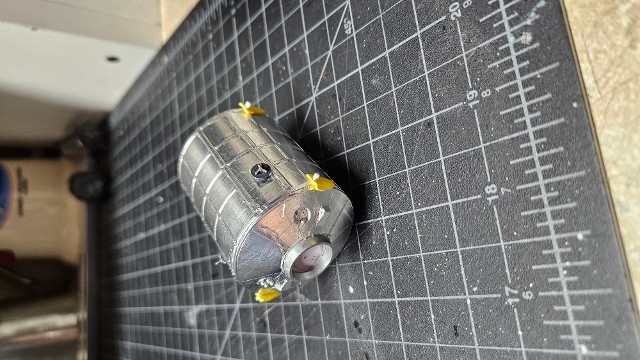
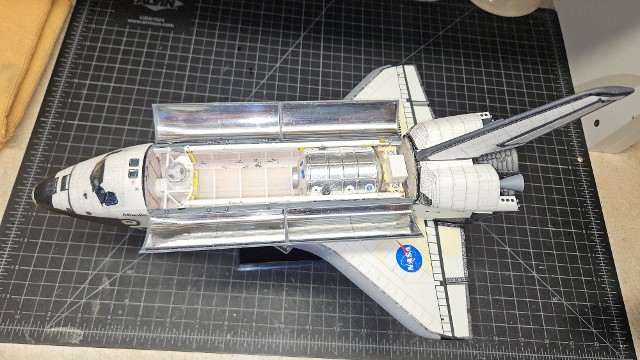
We also completed assembly and finish work on the Airlock Module, the Multi-Purpose Logistics Module (MPLM) and the EXPRESS cargo carrier, which will be placed into the Payload Bay.
The revised Tamiya model is now supplied with both the Canadian-built Remote Manipulator System arm (port side) and the Orbiter Boom Sensor System (OBSS - starboard side). Also included is the Ku-Band Antenna, shown in its "stowed" position. The upper surface of Altantis' wings appear to have a yellowish stain, possibly due to earlier markings which were removed and replaced with those seen presently. I used the pattern of those areas as seen in the "AXM Shuttle Markings Guide"," printed onto clear decal stock, adjusting the tint until I got the proper look.
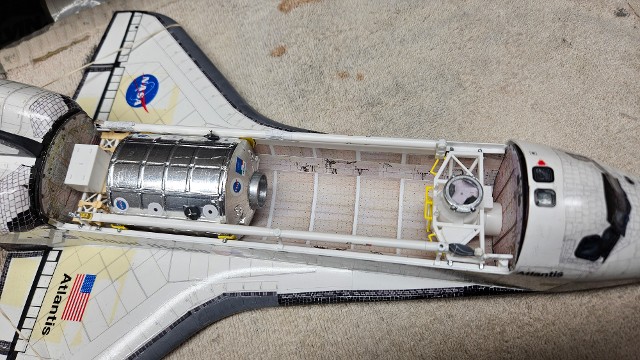
The completed and populated Payload Bay, prior to attachment of the doors.
At this point, I assembled the SSMEs & Aft Bulkhead into the aft structure of the Orbiter. I also installed both OMS Engines, as well as the rear RCS Thrusters.
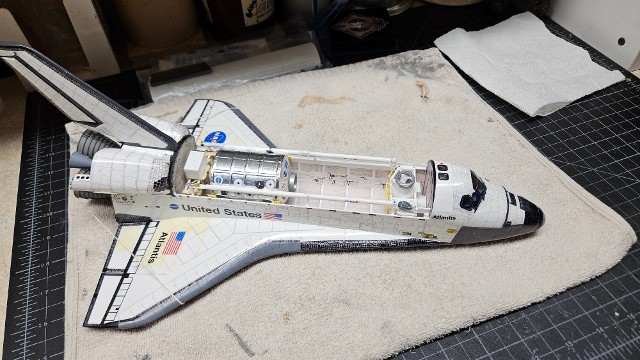
The fully assembled 1/100 scale Tamiya Space Shuttle "Atlantis," with Payload Bay Doors open.

Payload Bay Doors Closed, Port Side view.

A side-by-side comparison, between Early Era Orbiter "Columbia" and Late Era Orbiter "Atlantis."
Both Tamiya kits were produced in the tradition of high-quality Tamiya products are known for, but both required the use of additional detailing in order to truly achieve the best results.